- “Create a new Redis database in us-east-1”
- “List my databases”
- “Show all keys starting with “user:” in my users-db”
- “Create a backup”
- “Show me the throughput spikes for the last 7 days”
Quickstart
Step 1: Get your API Key
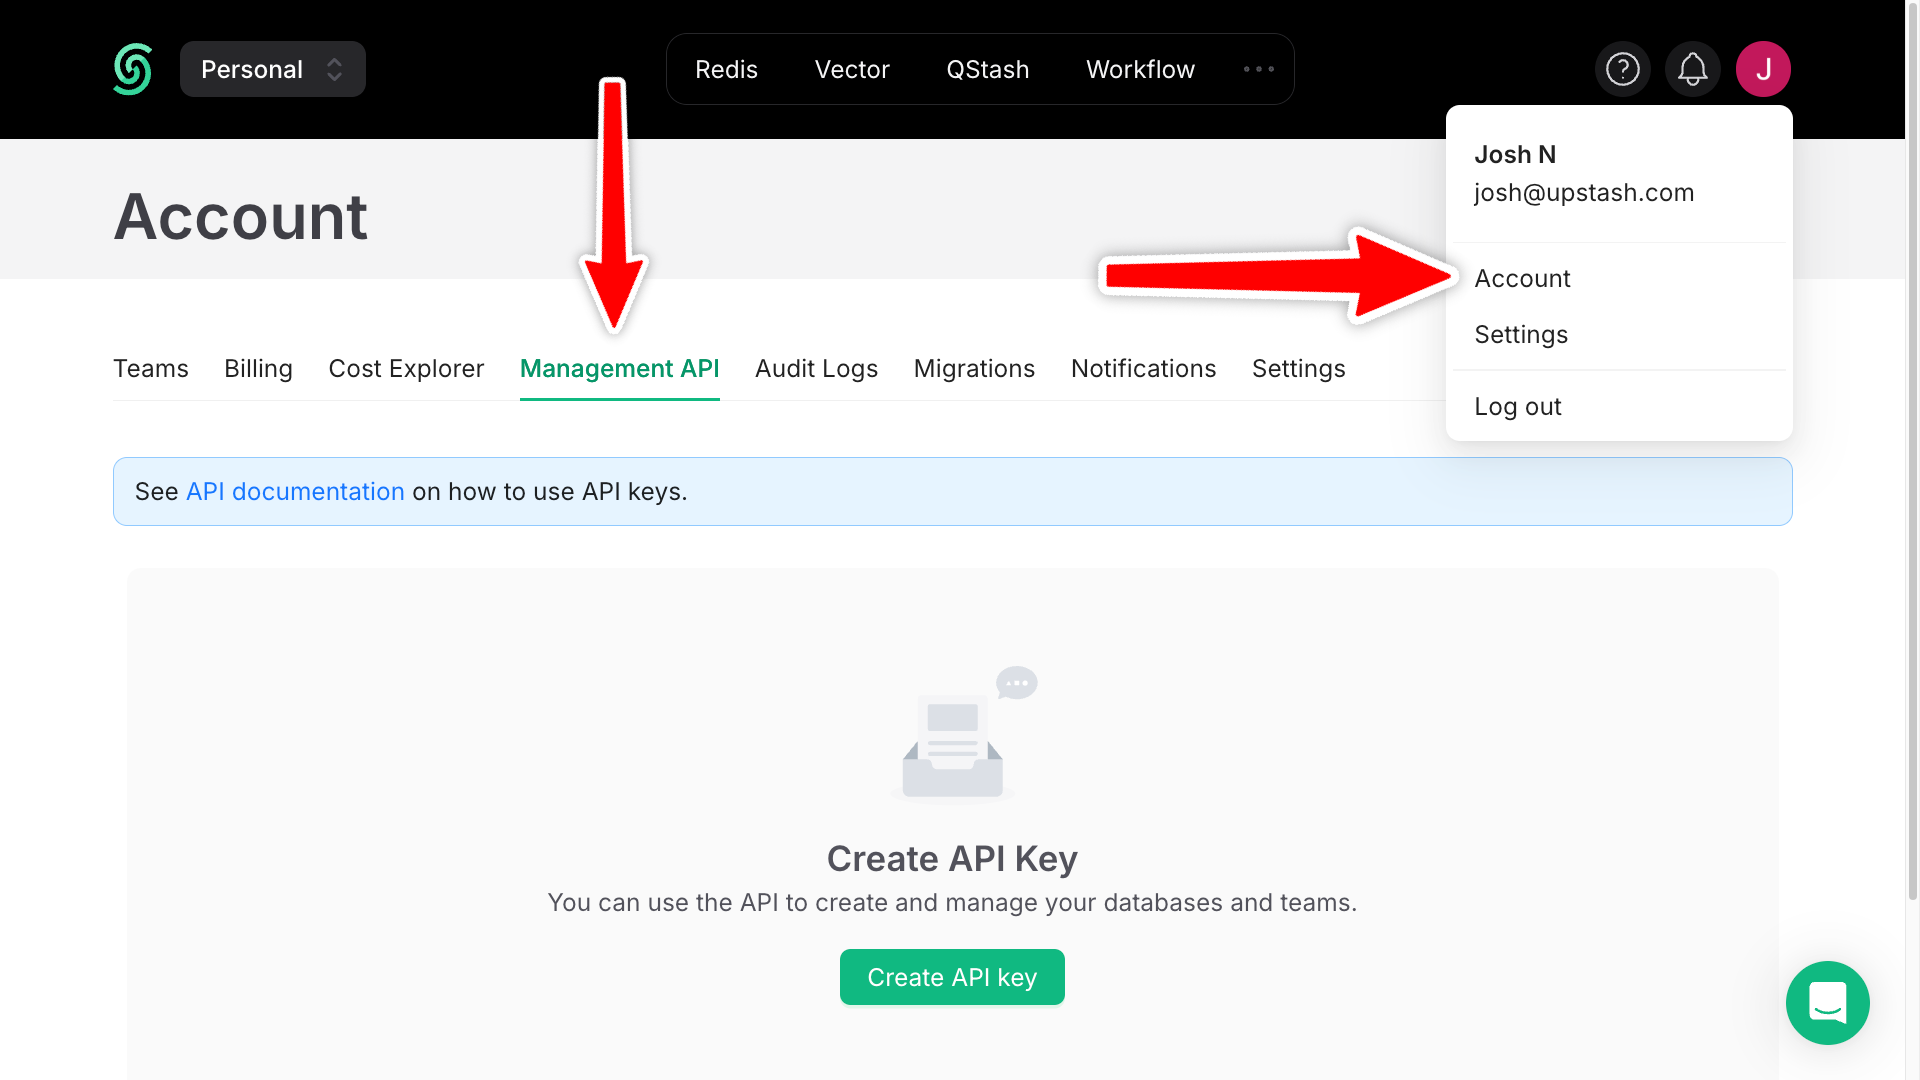
- Go to
Account > Management API > Create API keyand create an API key.
- Note down your
<UPSTASH_EMAIL>and<UPSTASH_API_KEY>.
Step 2: Locate mcp.json
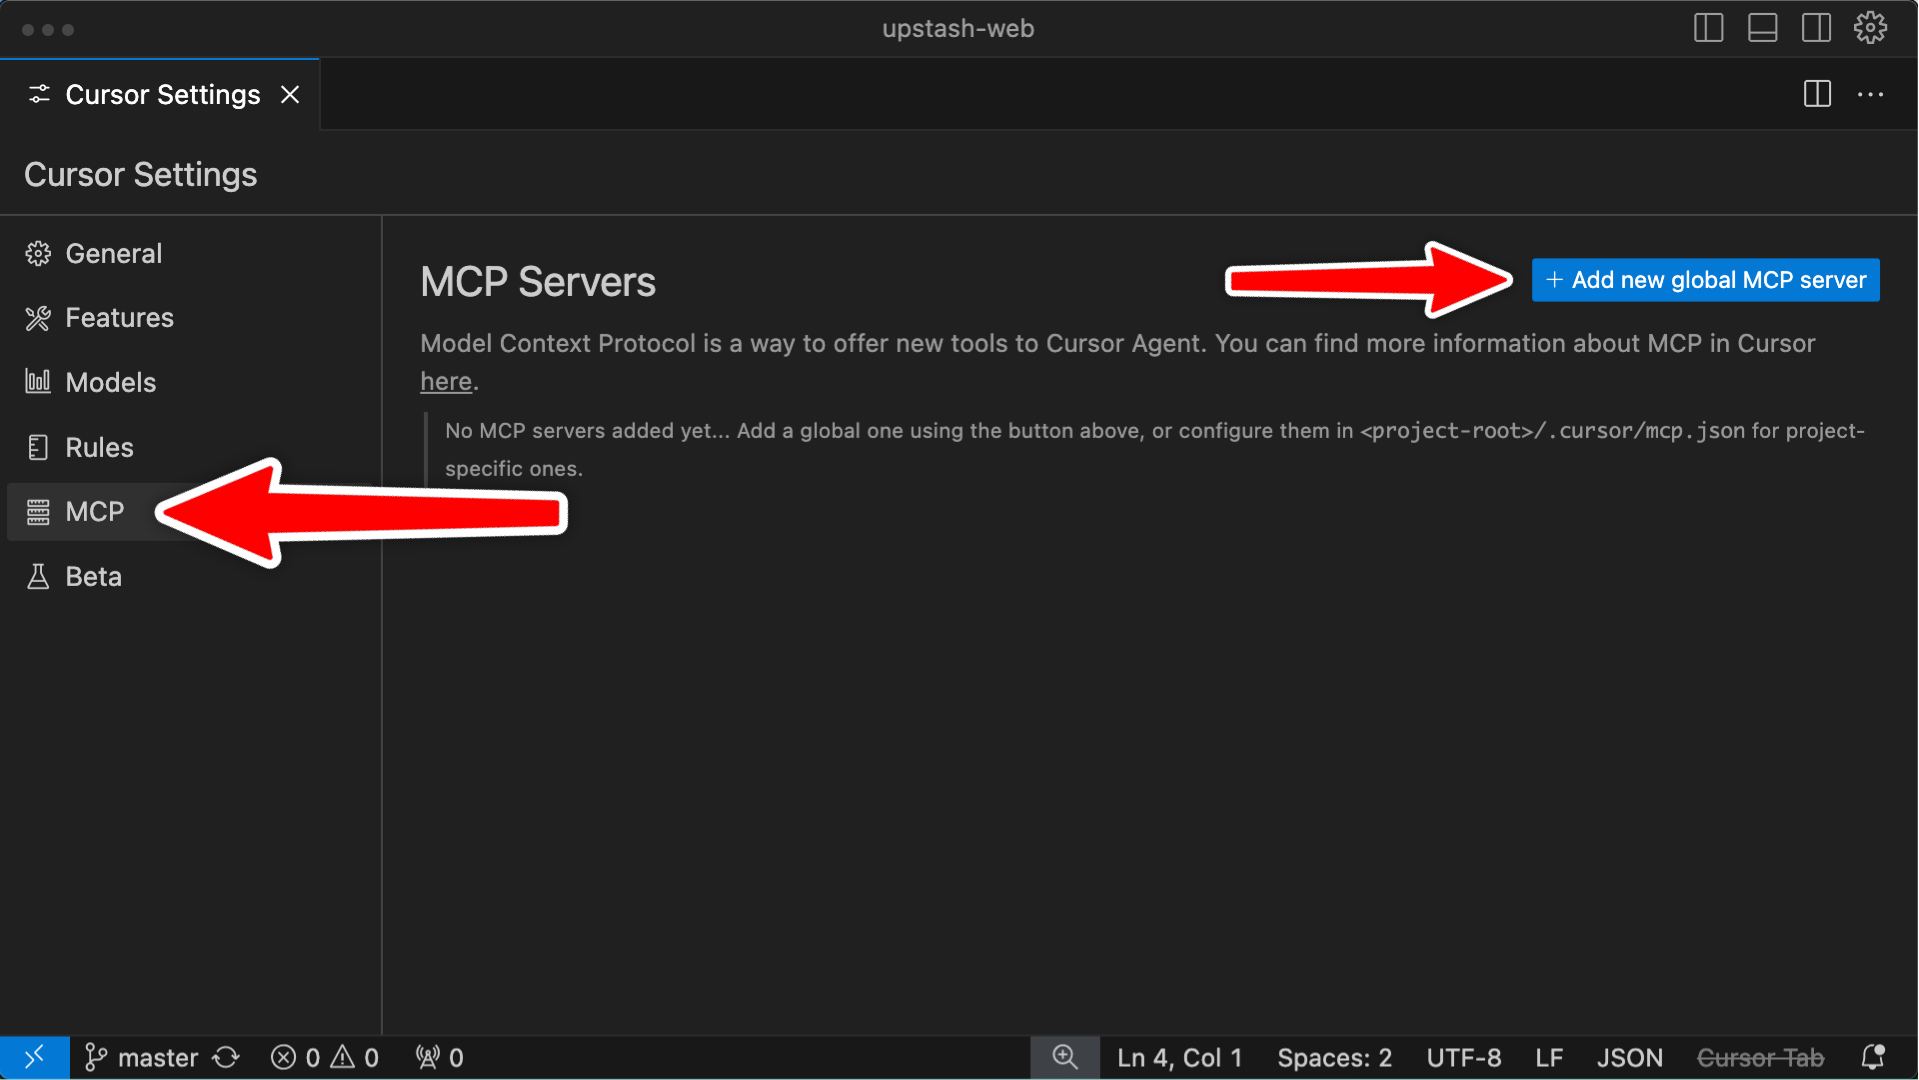
- Cursor: Navigate to
Cursor Settings > Features > MCPand click+ Add new global MCP server. This will open themcp.jsonfile.
- Claude: Navigate to
Settings > Developerand clickEdit Config. This will open theclaude_desktop_config.jsonfile. Refer to the MCP documentation for more details. - Copilot: Create a
.vscode/mcp.jsonfile in your workspace directory. For Copilot, first update themcp.jsonfile as described in the next step on this page, then follow the Copilot documentation (starting from step 2) to configure MCP servers in VS Code Chat.
Step 3: Configure the MCP Server
Claude Code CLI (Recommended with Claude)
If you’re using Claude Code, the easiest way to add the Upstash MCP server is via the CLI:.mcp.json in your project):
JSON Configuration (Cursor, Claude Desktop, Copilot)
Add the following configuration to your MCP file:Step 4: Use MCP with Your Client
Once your MCP is configured, your client can now interact with the MCP server for tasks like:- Seeding data
- Querying databases
- Creating new databases
- Managing backups
- Analyzing performance metrics

